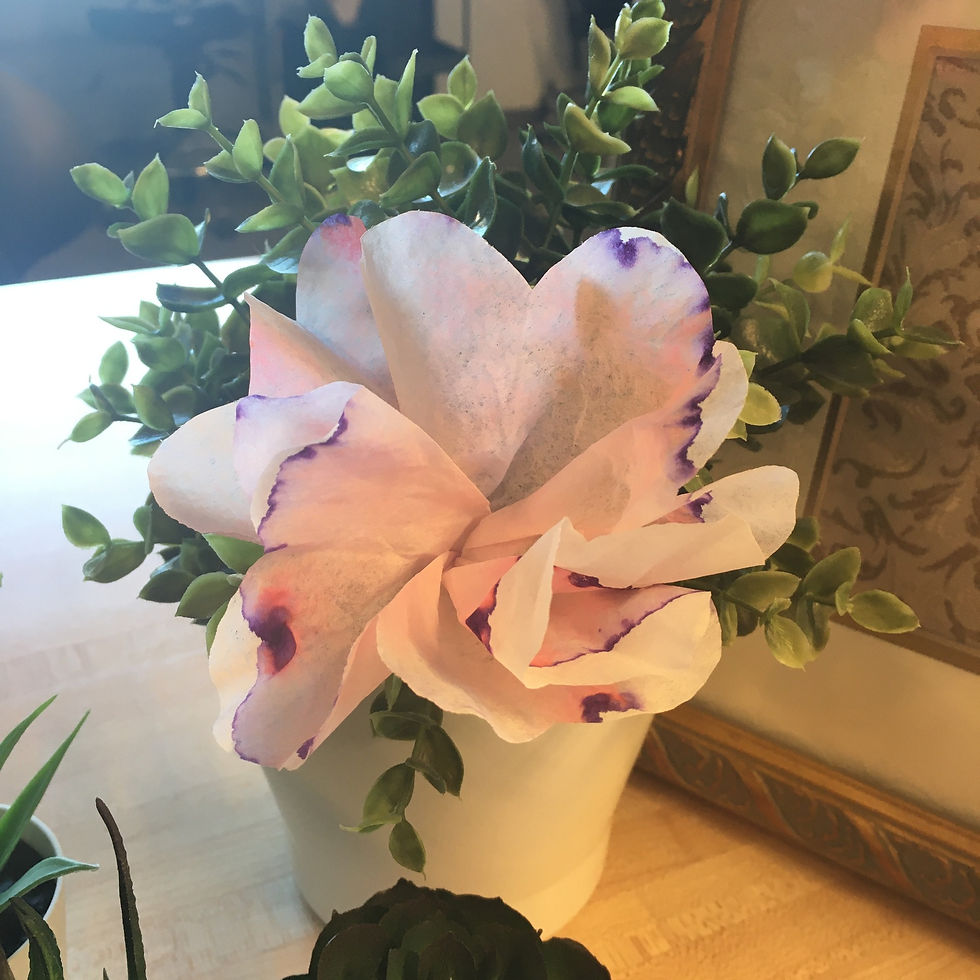
DIY Challenge: Paper Flowers
- tkerr1
- Nov 3, 2021
- 4 min read
This is a simple DIY challenge to create a paper flower. It's lots of fun, and they make great decorations or gifts! Use colored papers to mimic natural flowers, or for a more refined look, use book pages or sheet music.
Time: 10 minutes

Materials: paper, scissors, glue, wire (optional, not shown in materials photo)
Cut your paper into squares. We're going to need three squares to complete one flower, so if you'd like to make multiples, go ahead and save the extra square. You can also use the spare strip to make more squares for smaller flowers, but I'll leave that up to you.
Fold each square in half diagonally three times, as shown. This will give us eight petals per paper square, or 24 total. We'll end with a flower that has six layers of petals for a total of 21 - don't worry about how we'll get there right now.
Take your scissors and cut the edges of your triangles to make the outer edge of the petals. Use your imagination to create edges that suit the flower type you're going for. I'm going for a slightly pointed end, so I've gone ahead and cut an upwards tip. You could do anything here, so long as you make sure that the petal edge rises above the folding ends. We'll be working with those in a bit, so really make sure that the petal is well defined and comes up from the folded sides of the triangle. We're also going to snip a teeny bit off of the pointed end of the triangle, opposite to the petal. This is going to be the "core" of our flower, where it attaches to the wire. Snipping this also makes folding easier. Don't make it too big, or your flower will slide down your wire. If it's too small, you can open it up later with a sharp knife or scissors.
Take your scissors and gently cut out petals from each flower. You'll end up with six sets of petals, one with each of the following quantities of petals: 1, 2, 3, 5, 6, 7. Check the picture if you're not sure how it should look (step 4 in the photo). We're done with the scissors for now, but keep them handy just in case something needs trimmed.
Take the paper with seven petals. Arrange it so that it makes a ring with six petals - you'll overlap the two end petals together. If they don't overlap perfectly, don't worry. We'll snip them back into shape later. Once you've arranged them the way you want, put some glue on the petals where they overlap. Be careful when you do this! I'm using superglue because it's all I have with me, but I highly recommend using a glue stick like Elmer's.
Repeat this step for the papers with five and six petals. You'll end with three flower pieces total, one each with six, five, and four petals. That's good - it means our flower is halfway done! Notice that my five-petaled flower piece isn't lined up right. That's fine, I'll trim the petal before arranging the full flower so that it isn't an issue. If you have a similar problem, don't worry about it.
The next pieces are a bit harder to do. Start with your three-petaled piece. We need to keep all these petals intact, so we aren't going to glue over one anymore. Instead, line up the two end petals at their edge, so they just barely overlap. Glue them together at that small point. It's not much contact, so you'll need to make sure you glue them firmly enough to hold. Your flower parts should be becoming more and more like funnels.
Repeat this step with the two petaled paper. For the final petal, it will help to roll it up as tightly as possible before gluing. Make sure to try and preserve as much of the petal as you can. This one's the center piece, though, so it doesn't have to be perfect. By the end of this step, you should have six distinct flower pieces. We're done with the glue now - all that's left is to arrange the flower and attach it to a stem.
If there's any petals you want to touch up, now's the time. I snipped the misaligned petals from step six in this step. I also curled the petals back on each piece slightly, to give the flower a blooming look. You can make whatever edits you want here, to give your flower the look you desire.
Layer the flower so that it's assembled. We'll be lining up each flower piece by the hole at the center. I like to do this step with the help of a wire or plastic filament, to make the process easier. The piece with six petals should be the outermost part, while the piece with one should be the innermost part. Once you've lined up your flower, use some wire cutters to snip each end of the wire. What I like to do to keep the flower together is twirl the wire at each end for support, but you could use glue, beads, or other methods to keep your flower in one piece.
Congratulations! I knew you could do it. Now you've got your very own fancy paper flower to wow your friends with. Be sure to post makes of this in the comments to show us all the neat flowers you can come up with. Happy making!


Comments